

Vaginoplasty dilation is not a footnote to your surgery. It is as central to your outcome as the procedure itself. Many patients are surprised by this, particularly those who assumed recovery was largely a matter of resting and waiting. The reality is that dilation is an active, ongoing practice that you will need to commit to — consistently, and in many cases for years.
That commitment is also manageable. Thousands of patients navigate the dilation schedule after vaginoplasty and go on to live normal, active lives. The purpose of this guide is to give you a clear, honest picture of what the dilation protocol for SRS involves: why it is necessary, what the schedule looks like from day one through long-term maintenance, exactly how to dilate, how to manage discomfort, and what mistakes to avoid. Read it before surgery, refer to it during recovery.
For a complete overview of SRS surgery in Thailand, including techniques and costs, see our sex reassignment surgery guide. For a full recovery overview, including what to expect week by week, see our vaginoplasty recovery guide. To understand why dilation requirements differ between techniques, see our comparison of penile inversion and sigmoid colon vaginoplasty.
Why Dilation Is Non-Negotiable After Vaginoplasty
In penile inversion vaginoplasty, the neovaginal canal is lined with repurposed skin from the penis and scrotum. That skin, like all skin, has a natural contractile tendency. The body does not recognise the neovagina as a permanent structure in the way it does bone or muscle. Left without regular physical distension, the tissue will contract, and the canal will narrow and shorten. This process can happen surprisingly quickly in the early post-operative period, particularly in the first few months when wound healing and scar formation are most active.
Dilation applies sustained, gentle pressure that physically prevents this contraction. It maintains the depth and calibre that surgery achieved, keeps scar tissue mobile rather than rigid, and supports sensory adaptation in the healing tissue. Without it, the result is vaginal stenosis: a narrowing or shortening of the canal that is uncomfortable, can make penetration impossible, and in severe cases may require surgical revision.
Dilation after vaginoplasty is lifelong. Frequency reduces significantly after the first year, from multiple daily sessions to a few times per month, but the practice does not stop entirely for most patients. Starting this commitment with a clear understanding of the timeline makes it considerably more manageable.
Note: sigmoid colon vaginoplasty works differently. Because the canal is lined with intestinal mucosa rather than skin graft, it is self-lubricating and less prone to the same type of contraction. Dilation protocols vary accordingly. Your surgeon will provide technique-specific guidance. For more on this, see our penile inversion vaginoplasty explainer.
The Complete Dilation Schedule After Vaginoplasty
The schedule below reflects the general consensus from leading gender-affirming care institutions, including the UCSF Gender Affirming Health Program and specialist pelvic rehabilitation guidance. Your surgeon will provide a protocol specific to your technique, anatomy, and healing progress. Always follow your surgeon’s instructions over any general reference, including this one.
| Phase | Timeframe | Frequency | Session length | Key focus |
| Hospital | Days 5-7 post-op | First session taught by nursing team | 15-20 min | First insertion with smallest dilator; nurse guidance essential |
| Acute | Weeks 1-6 | 3-4 times per day | 15-30 min each | Wound healing and graft take; tissue highly reactive; establish routine |
| Subacute | Weeks 6-12 | 2-3 times per day | 15-30 min each | Epithelialisation and scar remodelling; begin progressing dilator sizes |
| Maintenance I | Months 3-6 | Once daily | 10-20 min | Most swelling resolved; approach nearer to long-term depth; sexual activity may be cleared |
| Maintenance II | Months 6-12 | 2-3 times per week | 10-15 min | Scar maturation; frequency reducible if consistent depth maintained |
| Long-term | Year 2 onwards | 1-4 times per month | As tolerated | Ongoing lifelong maintenance; sexual activity partially substitutes; adjust if tightness returns |
The frequency in this table represents a general consensus range. Some surgeons prescribe more intensive early-stage dilation (four times daily for the first month); others specify exact session durations. The core principle is consistent: high frequency early, gradually reducing as tissue matures and stabilises.
If you miss a session, do not skip the next one to “compensate.” Resume your normal schedule as soon as possible. Consistency over months matters more than any single missed session, but patterns of skipping are where problems develop.
Dilator Sizes: Starting Small, Progressing Gradually
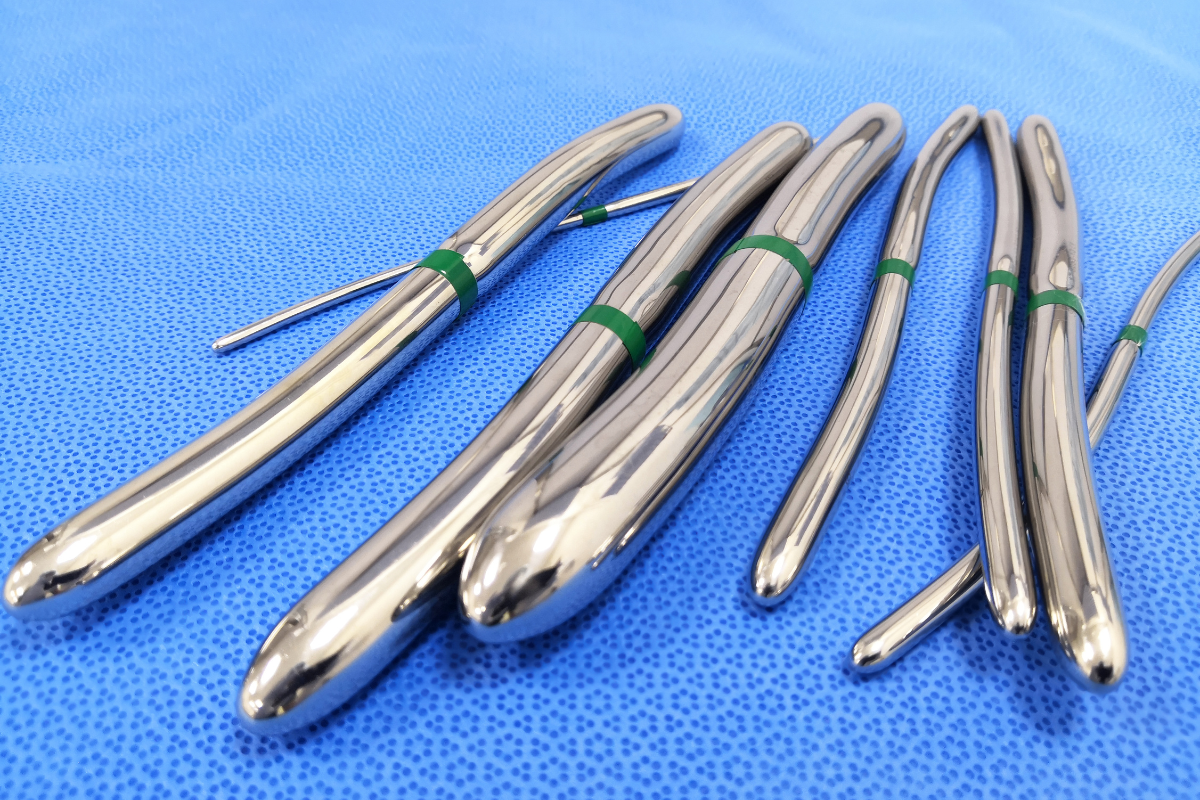
Dilators come in sets, typically with four to five graduated sizes. You begin with the smallest dilator that can be comfortably inserted. The goal over the first weeks is not to push immediately to the largest size but to begin with a size that enables you to dilate without force, establish your technique, and then progress as healing allows.
A common progression for penile inversion vaginoplasty patients, based on published clinical protocols:
- Week 1: Size 0 (smallest), introduced during your first guided dilation at the hospital
- Week 2: Sizes 0 and 1, alternating within sessions
- Week 3-4: Progress to size 2 as tolerance allows and swelling reduces
- Week 5-6: Introduce size 3
- Week 7-8 onwards: Size 4 or the largest size your protocol includes, once comfortable
Progressing too quickly is counterproductive. Forcing a larger dilator before the tissue is ready causes pain, can disrupt healing, and makes it less likely you will maintain the dilation schedule. Progress when insertion is comfortable and controlled, not before.
Reducing in size at any point is not a setback. If a follow-up appointment suggests some narrowing has occurred, your team may recommend returning to a smaller size and rebuilding. This is a normal part of managing the process, not a failure.
Step-by-Step Dilation Technique
Technique matters as much as frequency. Dilating correctly is more effective and less uncomfortable than rushing through sessions. The following steps reflect standard clinical guidance.
- Wash your hands thoroughly. Clean the dilator with warm water and mild antibacterial soap; rinse and dry with a clean cloth. Never share dilators.
- Find a comfortable, supported position. Many patients lie on their back with knees bent and feet flat, or use a semi-reclined position with a pillow under the hips. A small hand mirror helps with positioning in the early weeks.
- Apply water-based lubricant generously to the dilator and the vaginal opening. Do not use too little. More lubricant makes the process significantly easier and more comfortable.
- Take a few slow, deliberate breaths before insertion. The pelvic floor muscles need to be in a relaxed state. Tensing up makes insertion harder and can cause pain. Consciously releasing pelvic floor tension before you begin is not just helpful; it is necessary.
- Insert the dilator at approximately a 45-degree angle toward the floor, then redirect inward toward the small of your back once the tip is past the opening. Never push with force.
- Insert to the point of gentle resistance, then apply steady, calm pressure. Hold the dilator in place for the duration of your session without thrusting. The goal is sustained distension, not movement.
- After the session, gently remove the dilator and rinse the vaginal canal with warm water. Wash the dilator again before storing it in its case.
Dilation should never cause sharp or intense pain. A sense of pressure, stretching, or mild discomfort is normal and expected. Sharp pain, burning, or significant bleeding during or after dilation is a signal to stop and contact your surgical team.
Lubricant: What to Use, What to Avoid
Lubricant is not optional during dilation. Using too little is one of the most common and easily avoidable causes of painful or difficult sessions. Apply enough that the dilator glides without friction, and reapply if the session is longer or if you notice any drag.
| Lubricant type | Guidance |
| Water-based lubricant | Safe from day one. Use generously. Reapply as needed during each session. |
| Almond oil (natural) | Some specialists permit from around 6 months post-op if water-based lubricant is causing irritation. Confirm with your surgeon. |
| Silicone-based lubricant | Avoid for the first 12 months post-op; can degrade silicone dilators and is not recommended until tissue is fully matured. |
| Petroleum-based products (Vaseline, baby oil) | Avoid entirely. Can harbour bacteria and degrade dilator materials. |
| Flavoured or warming lubricants | Avoid. These contain additives that irritate healing tissue. |
If water-based lubricants are causing dryness or irritation over time, discuss alternatives with your surgical team. Some patients transition to natural oil-based lubricants after the first six months. This should always be confirmed with your surgeon rather than decided independently.
Managing Discomfort: What Is Normal and What Is Not
Some discomfort during dilation, particularly in the first weeks, is expected and does not mean something is wrong. Understanding the distinction between normal post-surgical discomfort and signals that require medical attention helps patients manage the process without unnecessary anxiety, and also without ignoring something important.
Normal during early recovery
- A sense of pressure, fullness, or stretching during dilation
- Mild soreness after sessions, particularly in the first four to six weeks
- Needing to pause and breathe through the pressure during longer sessions
- Some variation in how easy or difficult dilation feels from day to day
Contact your surgical team if you experience
- Sharp, stabbing, or burning pain during or immediately after dilation
- Dilation is becoming progressively more difficult over several days rather than easier
- Significant bleeding during or after a dilation session
- Foul-smelling discharge
- A sudden sense that you cannot insert the dilator as far as you previously could
- Fever alongside dilation discomfort
Vaginal stenosis is the most serious long-term complication of inadequate dilation. Stenosis means the neovaginal canal has narrowed or shortened. In mild cases, it can be reversed by increasing the dilation frequency. In more advanced cases it requires surgical intervention. Early-stage stenosis is always easier to address than late-stage.
The Pelvic Floor Connection
Pelvic floor tension is an underappreciated factor in dilation difficulty. Research cited in the Herman and Wallace Pelvic Rehabilitation guidelines notes that pelvic floor muscles are in a default “on” state, unlike most other muscles in the body. Studies have found that between 42% and 78% of patients seeking vaginoplasty have pre-existing pelvic floor dysfunction. After surgery, this tension can make dilation feel harder than it should, or create a sensation of hitting a wall before reaching the full depth of the neovaginal canal.
Pelvic floor physiotherapy is increasingly recognised as a valuable part of gender-affirming surgery aftercare, both before surgery to prepare and after surgery to address muscle tension, improve dilation comfort, and support sensory recovery. If dilation is consistently painful despite correct technique and adequate lubrication, a referral to a pelvic floor specialist is a reasonable next step.
Medidash can help coordinate referrals and remote physiotherapy consultations as part of ongoing post-operative support. Get in touch if this would be useful.
The Most Common Dilation Mistakes
These are the patterns that most often lead to poor long-term outcomes. Awareness of them before surgery helps patients avoid them.
- Skipping sessions because you feel comfortable. The canal feeling fine is the goal, but the reason it feels fine is because you are dilating. Stop, and that feeling will not last.
- Using too little lubricant. Friction makes dilation uncomfortable, which discourages dilation, which leads to stenosis. Generosity with lubricant is not wasted.
- Progressing through dilator sizes too quickly. Larger is not always better if it means forcing insertion. Gradual progression builds better long-term tolerance.
- Dilating without relaxing the pelvic floor first. Inserting a dilator against a tense pelvic floor is ineffective and painful. Breathing and consciously releasing tension first is not optional.
- Using the wrong lubricant. Petroleum-based or silicone products can damage dilator materials and irritate healing tissue. Water-based lubricant for the first year.
- Assuming penetrative sex fully replaces dilation in early months. Sexual activity does substitute for some dilation sessions after the three-month clearance mark, but not all, particularly in the first year.
- Not communicating with your care team when dilation is difficult. Painful or obstructed dilation is a clinical signal, not a personal failure. Your team has solutions.
Does Penetrative Sex Replace Dilation?
Penetrative vaginal intercourse does help maintain neovaginal depth and calibre, and most surgeons count it as a substitute for a dilation session. However, it does not fully replace dilation in the early months for several reasons: it cannot be controlled as precisely as a dilator session in terms of depth and pressure, and clearance for sexual activity is typically not granted until at least three months post-surgery.
Once you have been cleared for penetrative sex, your surgical team will advise how this affects your dilation schedule. A typical adjustment in the maintenance phase is to count each sexual encounter as equivalent to a dilation session. During periods with no sexual activity, return to the dilator schedule. The principle is that the neovaginal canal needs regular distension from some source; the source can vary.
In long-term maintenance, patients who are regularly sexually active may be able to reduce formal dilation to very low frequency. Those who are not should maintain a consistent schedule regardless. Your surgeon’s guidance on this should take precedence over general advice.
How Long Do You Have to Dilate After Vaginoplasty?

This is the question most patients are most anxious about, and the honest answer is: indefinitely, but the burden decreases dramatically over time. In the first weeks after surgery, dilation is intensive, time-consuming, and logistically challenging. By the end of the first year, most patients are dilating just a few times per week. By year two, many are down to a few times per month.
The reason dilation never fully stops for most penile inversion vaginoplasty patients is that the neovaginal canal does not have the autonomous self-maintenance that a natal vagina has. Reducing to a very low frequency is achievable, and for most patients, it becomes a minor part of their routine rather than a dominant feature of their life. But eliminating it entirely carries the risk of gradual stenosis over years, which is harder to address than consistent low-frequency maintenance.
Think of long-term dilation maintenance like any other health practice: it exists in the background of your life rather than the foreground. Patients who build it into their routine early, when it requires the most effort, consistently report that it becomes less disruptive over time.
For patients with questions about dilation at any stage of their recovery, Medidash provides ongoing post-operative support and can help coordinate with your surgical team. To discuss your options or get started with planning, get in touch with the Medidash team. For a full guide to planning your gender-affirming surgery journey, see our complete guide to MTF bottom surgery.